Meta Description:
Learn how to replace a halogen flood light with an energy-efficient LED floodlight in this easy step-by-step guide. Save money, boost safety, and enjoy better lighting performance.
Introduction
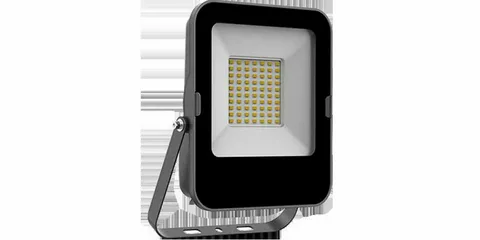
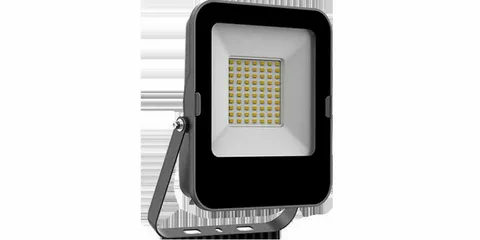
Halogen flood lights have been a common choice for outdoor lighting for decades. However, with the rise of energy-efficient, long-lasting, and eco-friendly lighting solutions, LED flood lights have taken center stage. Replacing your old halogen flood light with an LED version not only saves electricity but also reduces maintenance costs and improves overall lighting performance.
This step-by-step guide will walk you through the entire process of replacing a halogen flood light with an LED floodlight — safely and efficiently.
Why Switch to LED Flood Lights?
Before diving into the replacement process, let’s quickly review why switching from halogen to LED is a smart move:
- Energy Efficiency: LED flood lights consume up to 80% less electricity compared to halogen lights.
- Longer Lifespan: LEDs can last 25,000 to 50,000 hours, far surpassing the 2,000-hour lifespan of halogen bulbs.
- Lower Heat Output: Halogens get extremely hot; LEDs run cool and are safer to use.
- Eco-Friendly: LEDs do not contain harmful chemicals and are recyclable.
- Instant Brightness: Unlike some traditional lights, LEDs light up instantly without warming up.

Tools and Materials Needed
To complete this project, gather the following tools and materials:
- Replacement LED flood light
- Screwdrivers (Phillips and flathead)
- Wire strippers/cutters
- Electrical tape
- Voltage tester
- Mounting hardware (if not included with your LED light)
- Ladder (if your flood light is mounted high)
- Safety gloves and glasses
Safety First: Turn Off the Power
Before working with any electrical fixture:
- Switch off the circuit breaker connected to the outdoor lighting.
- Use a voltage tester to confirm there’s no power flowing to the wires.
- Make sure you’re working in dry conditions and using insulated tools.
Step 1: Remove the Halogen Flood Light
Now that the power is off and the area is safe:
- Unscrew the Halogen Fixture
Use a screwdriver to loosen the mounting screws holding the halogen light in place. Carefully support the fixture with one hand while removing the screws to prevent it from falling. - Disconnect the Wiring
Inside the fixture, you’ll see the wiring — typically a live wire (black or brown), a neutral wire (white or blue), and a ground wire (green or bare copper). Use a screwdriver to disconnect the wire connectors or untwist the wires. - Remove the Fixture Completely
Once the wiring is disconnected, you can safely take down the old halogen fixture.
Step 2: Prepare for the New LED Fixture
Before installing the LED flood light:
- Inspect the Junction Box
Check if the existing electrical box or mounting plate is in good condition. If it’s corroded or loose, it should be replaced or repaired. - Check Compatibility
Ensure your LED flood light supports the same voltage (usually 120V or 240V) and mounting type as the previous fixture. - Match Wire Colors
Familiarize yourself with the wire colors on the LED fixture. Most will follow standard color codes:- Brown or Black = Live
- Blue or White = Neutral
- Green or Yellow-Green = Ground
Step 3: Install the LED Flood Light
- Connect the Wires
- Twist the corresponding wires together: live to live, neutral to neutral, and ground to ground.
- Secure each connection with wire nuts or terminal blocks.
- Wrap the connections with electrical tape for added protection.
- Mount the Fixture
- Position the LED flood light in place and screw it into the existing mounting holes or bracket.
- Adjust the angle of the light to ensure it covers your desired area.
- Seal and Protect
- If the fixture is outdoors, make sure all connections are protected from moisture. Use waterproof gaskets or silicone sealant around the junction box.
Step 4: Test the LED Light
- Turn the Power Back On
Go back to your breaker panel and turn the power back on. - Check the Operation
- If the light has a built-in sensor, wait for it to detect movement or nightfall.
- If it’s switch-operated, turn it on and verify that the light works.
- Adjust Brightness or Settings (If Available)
Some LED flood lights come with adjustable brightness, timers, or motion sensors. Configure these as needed.
Additional Tips for a Smooth Upgrade
- Use Motion Sensors for Security
Many LED flood lights come with integrated motion sensors, adding an extra layer of security to your home. - Go for Dimmable LEDs if Needed
If you want lighting flexibility, choose dimmable LED models — but make sure your switch is compatible. - Buy from a Reputable Brand
Avoid cheap LED lights with low-quality components. Choose well-reviewed products with a warranty. - Consider Smart LED Flood Lights
These can be controlled via apps or voice assistants, giving you greater control and automation.
Cost Comparison: LED vs Halogen
| Feature | Halogen Flood Light | LED Flood Light |
|---|---|---|
| Lifespan | 2,000 hours | 25,000 – 50,000 hours |
| Power Consumption | High (100–500W) | Low (10–100W equivalent) |
| Heat Output | Very High | Minimal |
| Initial Cost | Low | Moderate |
| Long-Term Cost | High (bulb + energy) | Low |
Though LED lights may cost more upfront, they quickly pay for themselves through energy savings and longevity.
Conclusion
Replacing your halogen flood light with an LED version is a straightforward upgrade that can be completed in under an hour with basic tools and precautions. Not only will you enjoy brighter, more reliable lighting, but you’ll also save money on your energy bills and reduce your carbon footprint.


